
The Manage DIDs page allows you to search, review, and take bulk actions on your DID inventory. You’ll find this page under My Voice Network > Manage DIDs.
Find the Numbers You Need
- Search – Use the search bar to find a full number or a partial entry (e.g., last 4 digits).
- Filters/Columns – Click the filter icon to adjust visible columns or narrow your results.
-
Reset – Select Reset to Default View to clear filters and restore all columns.
Understanding the Columns
- DID – Your phone number.
- Type – Local or Toll-Free.
- Status – Current setup state. Unconfigured advises that the DID is not currently routed.
- Rate Center / State – The number’s assigned location.
- Routing Type – Shows how the number is routed (after configuration).
- Routing To – Displays the destination (after configuration).
- Tags – Labels applied by your team for better organization.
Review or Change a Number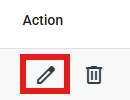
- Scroll to the “Action” Column and click the pencil icon (Edit)
-
From the DID Configuration screen, you can configure Voice, Messaging, and E911 settings.
Bulk Actions
- Use the “Job Selection” drop down menu to select the bulk job you wish to run.
- Download the applicable template for the selected job.
- Once you have entered your information into the template csv, upload the csv file to the Job Selection box
- The pending jobs section will show a record of your bulk requests. This can be filtered by the following: All jobs, pending jobs, in progress jobs, and completed jobs. You will also receive an email advising when your jobs has completed.
Pro Tips
- Use Tags to organize numbers for quick filtering (e.g., Support, West Coast).
- If a number shows Unconfigured, configure routing before sharing it externally to prevent failed calls.
- Can’t find the number you just purchased? Click Reset to Default View, then search again.
Troubleshooting
- Export is empty – No rows match your filters. Clear filters or broaden your search.
- Delete option is greyed out – Ensure at least one DID is selected.
- Missing columns – Adjust column controls or reset to default view.
What’s Next
- Configure DID Routing to assign numbers to the correct trunk or destination.
- Set up E911 and Messaging if required for your use case.
Need Help?
If you need assistance, email support@trunking.io with:
- The DID(s) involved
- What issue you are encountering
- Any filters currently applied
Comments
0 comments
Please sign in to leave a comment.