
This guide will walk you through how to purchase new phone numbers for your account. These numbers (DIDs) can then be assigned to trunks, configured for E911, or set up for messaging and CNAM services.
Guided Walkthrough
Where to Go
Navigate to My Voice Network > Purchase DIDs. You should have your target state, rate center, and desired quantity ready.
Find Available Numbers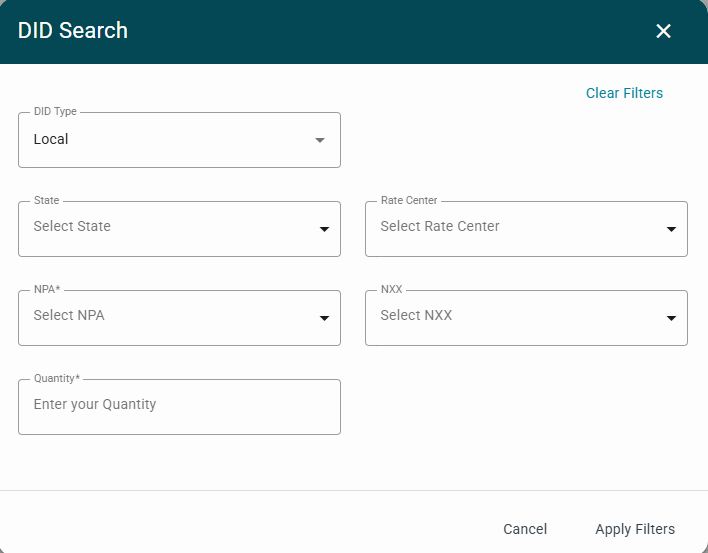
- Click DID Search.
- In the dialog box, set your filters:
- DID Type (e.g., Local/Toll-Free)
- State (includes provinces where available)
- Rate Center
- NPA and/or NXX
- Quantity
- Click Apply Filters. > Use Clear Filters anytime to reset and start over.
Select and Purchase
- Review the results list, which includes DID, Type, Rate Center, and State.
- Check the box next to the number(s) you’d like to purchase.
- Click Purchase Selected DIDs.
- Confirm your purchase in the pop-up window by selecting Purchase.
Note: Pricing and availability vary by market and account. For larger blocks or cost details, reach out to your account manager.
Pro Tips
- Need numbers in the same exchange? Use NPA + NXX together.
- If no results appear, try broadening your filters (e.g., select Rate Center only).
- Use Clear Search at the top of the page to reset the results table.
Troubleshooting
- No results? Remove one filter at a time (start with NXX), then click Apply Filters again.
- Purchase button disabled? Make sure at least one DID is selected.
- Wrong area selected? Click Clear Filters, then reselect the correct State and Rate Center.
What’s Next
- Go to Manage DIDs to assign numbers to a trunk.
- Configure E911 if the numbers will be used for emergency calling.
- Set up Messaging or CNAM if required for your use case.
Need Help?
If you need assistance, email support@trunking.io with:
- The filters you used
- The DIDs you attempted to purchase
- A brief description of your requirements
Comments
0 comments
Article is closed for comments.